So I've gotten slightly addicted to Instagram since downloading a few weeks ago. It's the first app I've seen that makes it easy and practical to find great photos and see what others think of yours. That's why I love it.
Initially I thought, wow, this changes everything about iPhoneography and how iPhone photos are shared. After using it for a few weeks, I've come to a very different conclusion.
My conclusion is this: Instagram changes a lot, but it makes the existence of a separate iPhoneography movement even more important rather than less.
Why? Primarily because the photos on Instagram are from all sorts of cameras. DSLRs, point and shoots, iPhones, iPods, etc. Posted here are two of my more popular Instagram pics that were taken with a DSLR. There is no way to know, as it exists today, what is from an iPhone and what is not. Which raises an important question - do people care about this? It's clear from the comments that people make that at least some do. And I'd guess it's more than a few although definitely not all. It's not uncommon to see things like:
"Why are people posting non-iPhone photos?!?!"
It screams frustration from those seeking true iPhoneography. Personally, I think there are two groups of people using Instagram. One group prefers to see iPhone only photos (the true iPhoneographers). The other group doesn't care and just wants to see cool pics. I like to think that I fall into both groups and decidedly have a need for both a Instagram (show me any cool pics) and my iPhoneography (show me what you can do with an iPhone) fix through top sites like LifeInLoFi and iPhoneography.
How does Instagram feel about it? Based on the fact that they could easily enforce an "iPhone photo only" policy with a just a few lines of code that check the EXIF, I'm guessing they aren't trying to be an iPhoneography targeted site. In fact I'd be shocked if they weren't hard at work on Android and other OS versions of the app.
I really have no idea what percentage of Instagram users would prefer iPhone only pics, but I would love to know.
How do you feel? Post a comment and share your opinion...
Thanks!
Josh
Friday, November 12, 2010
Saturday, October 23, 2010
ClearCam Demo
A while back I created a ClearCam promotional video when I got the app working on the iPod Touch. Since that time, enough people have told me that this was useful in understanding how to use the app, especially for comparing enhanced vs. original images, that I thought I'd post it here as a demo of how to use it.
Enjoy!
Thanks,
Josh
Enjoy!
Thanks,
Josh
Thursday, October 21, 2010
Getting the most out of ClearCam
When I partnered with Occipital earlier this year to bring ClearCam to the App Store, one of the primary reasons was that I was completely frustrated by how many poor pictures I took with my iPhone - even my iPhone 4. Sure, a lot of them came out great, but a lot didn't. The real problem was that I couldn't get myself to the point where I actually trusted the camera to capture the moment.
What's most interesting to me, as the developer, is that all the hype around ClearCam has been about Enhanced Mode (generating sharper images with less noise and much higher resolution - up to 11MP). Don't get me wrong, I use and love enhanced mode for those once-in-a-lifetime photos, but the fact that it takes time to process means I don't use it for everyday shooting. So for that reason I thought it might be appropriate to create a blog post about how and when I use the different modes of ClearCam.
Quick mode I think seems pretty boring to most people. It captures a handful of photos and keeps the best. Big deal right? You can do that yourself! At the same time, it's one of the best tricks I know to get great photos on my iPhone consistently. Why? In the past, the way I'd get good photos is by taking a bunch and then later deleting the bad ones. The problem with that is that I didn't always do it because it was a pain. If I took multiple shots every time, and had to go through my photos and delete the bad ones every time, it wouldn't happen. ClearCam's quick mode is perfect for me for a couple of reasons:
1) Every time I take a photo, it is the best of a burst. By design, you can't do worse than the stock camera, and by our testing, you'll usually do much, much better. By using Quick Mode as your default, the quality of your pictures will go up dramatically - at least they do for me.
2) Blurry photos on the iPhone are a common occurrence. Why? Because the shutter on the sensor stays open to get enough light in and any movement in the scene can cause blur. This can be due to shaking the camera, but it can also occur if the subject in the scene is moving. Anti-shake sensors deal with the camera shaking, but for me trying to photograph my crazy 1 year old, it did nothing. She moves constantly. Quick mode analyzes the scene rather than the camera shake so it will only keep the shot where she was reasonably still (i.e. the clearest shot).
I use quick mode for almost all my iPhone photography. And I've bought and tried almost every other app out there. There are some good ones, but none that let me start with the best picture possible besides ClearCam. If it doesn't work for you, email me at twoteethtech at gmail.com, and I'll invest some energy in the app to make sure it does.
Enhanced mode is good too - 11MP on your iPhone 4!?!? It's been validated as being legit at this point. We have many incredible reviews you can google. At the same time, it's a complete pain in the ass for me - it takes too long to be useful as a mode for everyday shooting. Keep your eye out for tweaks to make that mode easier to use.
Finally, when comparing ClearCam with the stock camera or your favorite photo app, keep a couple of things in mind.
1) If you compare two identical photos, make sure you zoom in on the detail. That's where you'll see the difference.
2) Any old app can take good pics in great light. To really see where ClearCam performs optimally, try taking some photos without perfect light and comparing.
The app is shaped by feedback from our users. Please email me at twoteethtech at gmail.com with your input. I want better pictures from my iPhone/iPod and I know you do too.
Thanks for your support!
Josh
Saturday, October 9, 2010
Tips for capturing the moment
How many times have you missed that perfect moment fumbling for your iPhone and trying to quickly snap a photo only to end up with a blurry picture that was taken too late anyway? Fortunately there are some common sense preparations that can help you to capture those fleeting moments.
Fast camera start-up is key, but it isn't what you might think
To some this means having a camera app that starts up quickly and is immediately ready to take a photo. That's certainly part of the equation, but there is a lot more to it.
Leave the camera app running when the phone is locked
No matter what camera app you use, the time to go from turning the phone on to snapping a photo can be greatly minimized by locking the iPhone while the camera is running. When you do this, as soon as the phone comes on you are ready to snap a photo. This is one of my favorite techniques for being ready to capture those picture perfect moments.
Turn off the security code
If you have to enter your security code every time you power your phone on, not only is that going to disturb the moment while people try to figure out what you are doing, it takes valuable time that can make the difference between capturing or not capturing the moment. If you must have a security code enabled, consider disabling when you suspect photo opportunities may arise (Settings/General/Passcode Lock).
Disable features like anti-shake that might delay the capture
Nothing is more frustrating than waiting for an anti-shake feature to give you the go ahead as a moment slips by. My advice is to disable it by default. There are certainly times where it is useful, but when you are trying to capture a fleeting moment, I find it just gets in the way. Instead of relying on anti-shake to minimize blur, take several quick photos. It is the most reliable technique I've found to minimize blur with the iPhone cameras.
Don't use zoom
If the iPhone had an optical zoom, I wouldn't be saying this. Unfortunately, it only has a digital zoom which does nothing more than throw away pixels and take valuable time to setup. It is a convenience function that allows you to crop your image while taking the picture. Sometimes that can be nice, but when you are in a hurry it does nothing but slow you down. You can achieve the exact same effect by using apps like Crop For Free or Photoshop after the moment has passed. Not only that, but you'll be able to take your time to make sure you get the framing of the image exactly how you'd like it. And perhaps that one photo really has several nice photos that can be cropped out. None of that would be possible if you ask your camera app to throw pixels away right away by using the zoom feature.
Take lots of photos and don't worry about getting some blurry ones
If you quickly snap just one photo with your iPhone, unfortunately there's a high probability it is going to be blurry. One of the best ways to eliminate blurry photos on the iPhone is to take several as I discussed in a previous blog entry (http://bit.ly/doNKIN). I've found that taking 3 or 4 quick photos almost always can eliminate blurry shots. And even those blurry shots can be turned into something interesting with the cool post-processing apps out there like Percolator and Toon Paint.
Use an app with fast shot to shot times
If you are using a camera app that takes a lot of time to save or process photos before you can take another one, the chances of getting a nice photo of fleeting moment is greatly reduced. Fortunately many of the apps available now allow fast shot to shot times. Just make sure that your app of choice does as well.
Don't waste time framing the perfect shot
Getting close is usually good enough and post-process cropping can work wonders on the framing of your shot. Often, some of the better shots I get are a result of just pulling out my phone and shooting without even looking at what is framed in the viewfinder.
Don't make it obvious you are shooting a picture
If you're too obvious about the fact that you are taking a picture, the moment is likely to be disrupted. It may be in just a small way, but sometimes that can make the difference. Again, sometimes shooting without knowing what's in the viewfinder is okay. Shoot from the hip and see what you get!
Keep your phone handy!
Finally, a very obvious tip, but how many times have you seen someone fumbling through their bag trying to get their camera out to capture a precious moment? My advice is to reserve a front pocket just for your iPhone and be ready to pull it out at any time.
These techniques have made a big difference for me. I hope they do for you as well!
Josh
Friday, October 8, 2010
Dramatic iPhone photos using depth of field techniques
One of the things that always fascinated me about photography is that the difference between a good photo and a really amazing photo is usually very subtle. I always felt as an amateur photographer that if I could figure out what those subtle things are and understand the tricks and techniques to include them in my photography, I could get some really great photos I'd be proud to display.
There are obviously a lot of factors that come into play in taking great photos. For many of the best photographers I think getting things just right is very instinctual. But instinct alone is not enough. It is absolutely essential for them to understand what effects are possible, and how to achieve them with the camera they are using. And understanding these things can make any of us better photographers.
A common difference I have noticed over the years between good photos and great photos is the use of depth of field. Great photos often have a shallow depth of field where the only the subject is in focus and everything else is blurry. Good photos on the other hand often have a large depth of field where nearly everything in the photo is in focus.
Often, the reason for this is that great photos are taken with great lenses that have a very large aperture and cost thousands of dollars. Most of us don't have the option of using these lenses, and when it comes to the iPhone, we're even more restricted because we're all stuck with the same lens. However, that doesn't mean you can't achieve amazing images with the iPhone by taking advantage of depth of field techniques.
With the iPhone camera being relatively restrictive, there's not a lot you can do, but that doesn't mean you can't capture some amazing images taking advantage of depth of field techniques. How? The technique I use is to get the camera very close to the subject of interest and use touch to focus. Note that this obviously requires an iPhone 3GS or iPhone 4 with touch to focus capability. Simple, yes, but using this technique can provide some dramatic images. A couple things you can try to experiment with this:
1) Take a picture at the dinner table. Perhaps the subject of interest could be a candle, or an amazing plate of food. Get the camera as close as possible to the subject, touch to set the focus on the subject and see what you get. For best results, make the subject only a small part of the scene and make sure you get something interesting in the background.
2) Take a picture in the grass. Get the camera as close as possible to the ground and touch to focus on the grassy area directly in front of the camera. Again, have the area of interest that is in focus take up only a small portion, maybe 1/3 of the image and make sure you have something interesting in the background. Perhaps a colorful structure, trees or a sunset.
The good news and the bad news is that there isn't much more to it. While the iPhone doesn't offer the same control that a DSLR camera or even a point and shoot can offer, it also means there's not a lot to think about when taking advantage of this technique.
I've had a lot of fun taking photos like this and hope you do to!
Thanks for your support!
Josh
Thursday, October 7, 2010
Tips for eliminating blurry iPhone photos
How many times have you ended up missing a great shot with your iPhone or iPod touch because it came out blurry?
Unfortunately it is a common occurrence even with the advanced capabilities of the iPhone 4. Understanding what causes the blur can go a long way toward eliminating it.
The major cause of blurry photos on the iPhone is shooting in low light
What happens in low light situations is that the camera shutter stays open longer. The longer the shutter is open, the more opportunity for the camera to move, or for subjects to move which is a direct cause of blur. There are many tricks and techniques to minimize this.
For those with an iPhone 4 the flash can help in this situation but only if the subjects are close enough to be illuminated by the flash. Even then I personally use it only rarely because it is one of the most blinding flashes I've seen. And if you are taking a photo of a landscape that you can't illuminate with your LED, some other techniques are required.
Minimize camera motion AND subject motion
The first thing to note is that keeping the camera still and minimizing subject motion becomes critical in low-light situations. Everything needs to stay still a bit longer to avoid blur because the shutter is open a bit longer collecting the image. There are several techniques you can use to minimize camera motion and subject motion.
Stabilize the camera (if you can without missing the moment!)
Set it on a hard surface, lean against a hard surface like a wall, or just wait until you are as steady as possible. Apps that use anti-shake sensors can be useful for this as well. The downside to all these techniques is that you may end up missing that fleeting moment you are trying to capture.
Time the photo to minimize subject motion
This takes a little skill to predict when your rambunctious pets, kids or friends will be still for a moment to get a good photo. It is especially challenging because you can't forget about keeping the camera stable also. You can achieve some nice effects though by following the subject with your camera to get a subject in focus with a blurry background.
Take several photos and just keep the best - the most reliable technique!
This is my favorite technique, because it works and I don't miss the moment waiting for subjects to stay still and getting the camera settled. Typically, when subject motion and shaky cameras are involved, taking several shots will result in at least one that comes out good. To get a good shot when you don't have time to stabilize the camera or minimize subject motion, it's best to have an app that can start quickly into a mode that captures photos rapidly. This will give you the best chance of getting a keeper.
Set the exposure manually for better results
An advanced technique that can be helpful to reduce blur is to set a lower exposure (faster shutter) so that stabilizing the camera and minimizing motion are less important. How? The best way to accomplish this is by taking advantage of apps that have the ability to set exposure separately. In ClearCam for example, you can double tap on the lightest area in the scene to minimize the exposure time. There are several apps available now that have this capability. Keep in mind that by minimizing the exposure time it is possible that your subject will come out underexposed, or too dark, in the image. There are many excellent apps available to help correct this during post-processing such as Photoshop or Photogene which is often a better trade-off than getting a properly exposed, but blurry image.
Give the camera a chance to focus!
Another obvious cause of blurry photos is not giving your camera a chance to properly focus. On the iPhone 3G and iPod touch, there isn't much to worry about since there is no auto-focus. They use what is called a fixed focus which just means that the focus is preset to handle most conditions. In the case of those devices, basically everything is in focus until it gets too close to the camera. I haven't carefully tested this, but as long as the subject is at least a few feet away you can expect the image to be in focus.
On the iPhone 4 and 3GS however, auto-focus comes into play. By default pretty much all camera apps run in auto-focus mode at startup. The key here is to be patient and give the camera an opportunity to focus. Alternatively, most apps offer a touch-to-focus capability that allows you to specify the interest point of the photo that want to be in focus. Again, being a little patient to make sure that the camera has had a chance to focus is key.
Eliminating blurry photos on your iPhone is one of the most challenging experiences for iPhoneographers. Understanding the causes has been very helpful for me in reducing the number of blurry photos I take and I hope it helps you as well! If you have other tips or questions, find us on twitter (@twoteethtech) or shoot us an email at twoteethtech at gmail.com.
Thanks for your support!
Josh
Thursday, September 23, 2010
Think your iPod Touch camera is weak?
When we saw the specs on the new iPod Touch camera (720x960, .69MP, and no auto-focus), we knew we had to do something. To have such a capable device without the ability to take great quality photos is really a shame. We put a lot of energy into ClearCam to optimize it for the iPod Touch and it is now available on the app store. We hope you enjoy it! Check it out:
Wednesday, July 7, 2010
ClearCam produces sharper and clearer images with more than double the resolution of the native camera. It is a must for those once in a lifetime photo opportunities when all you have is your iPhone. Probably the only reasonable option for taking pictures that are worthy of framing and putting up on the wall. Try it out here: http://bit.ly/cvkij0
ClearCam is one of the few iPhone apps that leverages iOS4 to do something more than multi-task. With access to raw photo information it applies sophisticated image processing techniques to produce sharper and clearer images with more than double the resolution of the native iPhone camera (http://en.wikipedia.org/wiki/Super-resolution).
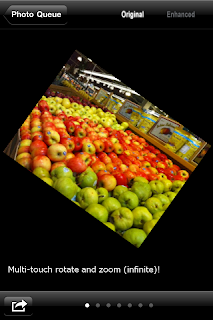
Don't forget to check out the multi-touch zoom and rotate interface. It let's you zoom to the pixel level to see what you are really getting...
- iPhone 3G: 2MP -> enhanced 4MP images
- iPhone 3GS: 3MP -> enhanced 6.75MP images
- iPhone 4: 5MP -> enhanced 11.25MP images
ClearCam is one of the few iPhone apps that leverages iOS4 to do something more than multi-task. With access to raw photo information it applies sophisticated image processing techniques to produce sharper and clearer images with more than double the resolution of the native iPhone camera (http://en.wikipedia.org/wiki/Super-resolution).
Don't forget to check out the multi-touch zoom and rotate interface. It let's you zoom to the pixel level to see what you are really getting...
Subscribe to:
Posts (Atom)